SSH 到 Windows Server
Table of Contents
最近因為需求要接手 Windows Server 進行維護與開發
因為只有在很久以前幫別人處理 IIS Server 一點經驗
時間也非常久了
所以筆記一下這次的處理過程
這次處理的 server 版本是 Windows Server 2019
#
SSH on GCP Compute Engine
如果是建置在 Google Cloud 的 Compute Engine 上的話
就參考文件 Getting started with OpenSSH on Windows Compute Engine instances 就可以了
#
前置作業
之前似乎是採用 remote desktop 的方式
這對習慣命令列操作的人來說會有點不習慣
而且交接程式碼和檔案都放在那台機器上
所以為了之後方便操作, 首先就要安裝 OpenSSH
##
安裝 OpenSSH server
因為 SSH 會有 server 和 client 的部分
因為是需要連進去 Windows Server
所以只需要處理 OpenSSH server 的部分
- 開啟 設定,選取 [應用程式] > 應用程式 & 功能,然後選取 [選用功能]。

- 掃描清單,查看是否已安裝 OpenSSH。 如果沒有,請在頁面頂端選取 [ 新增功能],然後:
- 尋找 OpenSSH 用戶端,然後按一下 [安裝]。
- 尋找 OpenSSH 伺服器,然後按一下 [安裝]。
![尋找 OpenSSH 伺服器,然後按一下 [安裝]。](https://firebasestorage.googleapis.com/v0/b/storage-bucket-83851.appspot.com/o/blog%2F%E6%88%AA%E5%9C%96%202022-10-09%20%E4%B8%8B%E5%8D%887.27.27.png?alt=media&token=99f88b20-c30d-49f5-9cc5-e6e2c7a2add1)
##
設定 SSH
使用 PowerShell
Start-Service sshd
Add-WindowsCapability -Online -Name OpenSSH.Server
這時應該會輸出
Path          :
Online        : True
RestartNeeded : False
##
設定
修改 SSH 設定
start-process notepad C:\Programdata\ssh\sshd_config
##
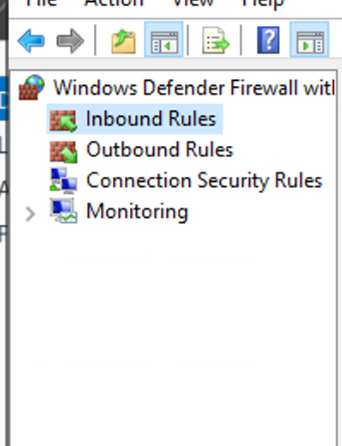
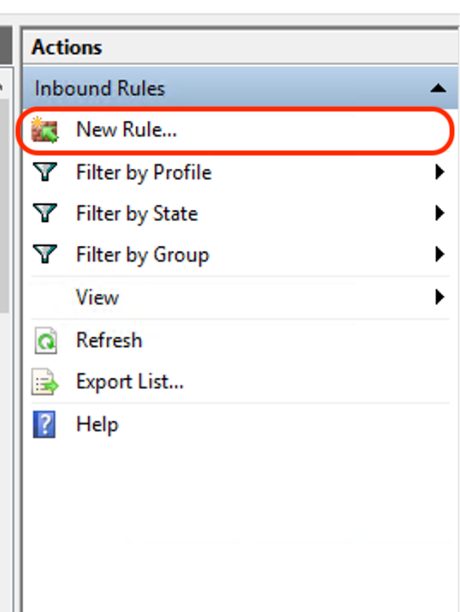
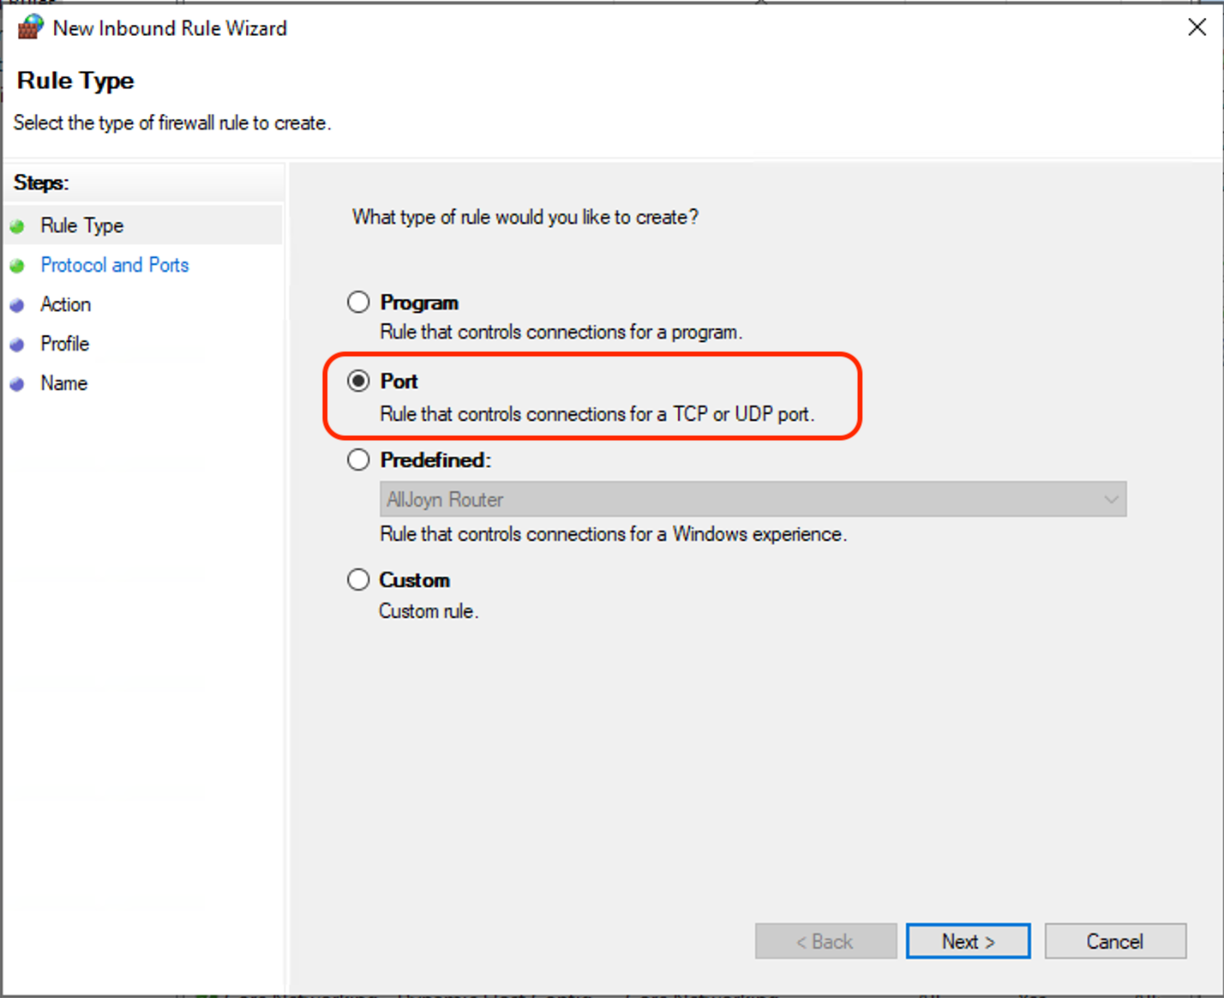
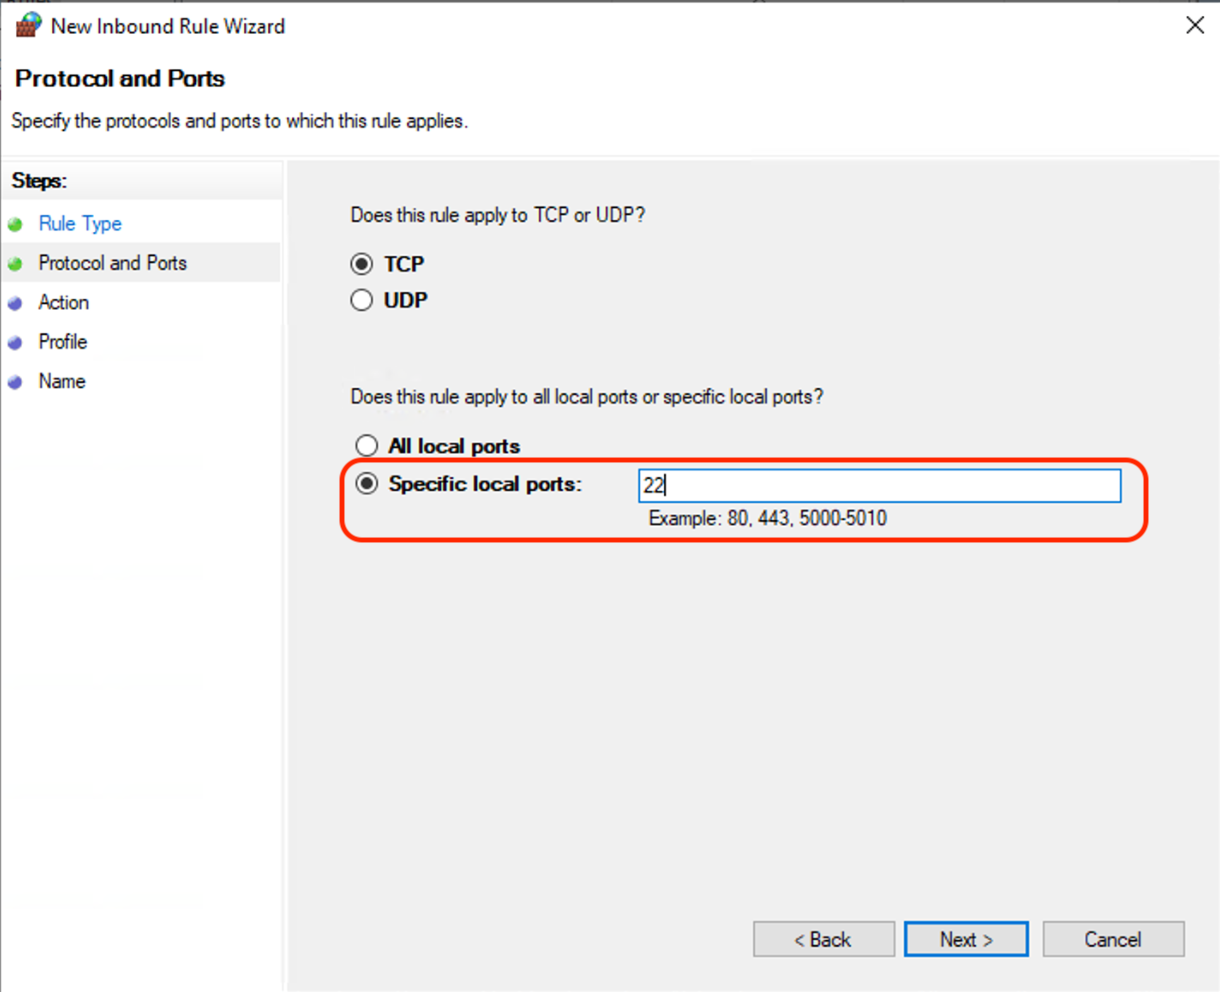
設定防火牆
Server Manager -> Tool -> Windows Defender Firewall with Advanced Security

Inbound Rules -> New Rule
Refer - How to Install OpenSSH on Windows Server 2019 or 2022
#
SSH 連線
因為目前沒有建立 ssh key 來連線的打算
這邊是還用帳號密碼來連線
ssh <用戶名>@<IP>
之後再填入密碼來登入
administrator@WINDOWS C:\Users\Administrator>
這邊需要注意的因為是連線到 Windows
所以要用的指令都得是 Dos 指令
#
利用 SCP 把資料複製下來
這邊的例子是在 Mac scp Windows Server 到 Mac
需要注意的是在使用 SCP 時, Windows 路徑的分隔符號得調整
scp -r <用戶名>@<IP>:C:/<路徑>/<目標資料夾> <本地端資料夾>